Posts: 251
Threads: 26
Joined: Feb 2019
Reputation:
13
Gimp version:
Operating system(s): Windows Vista or 7, 8, 10 (64-bit)
Linux
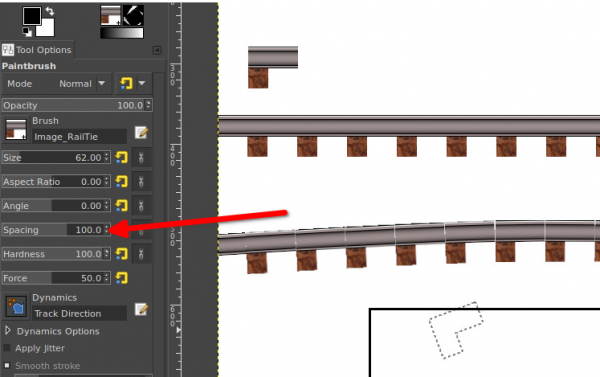
On the linked image, the top graphic is a brush. The next graphic down is a line created by stroking a straight path with that brush.
The third line is stroking a slightly bowed path, again with the same brush. Note all the gaps and imperfections.
Am I just missing something that needs to be done to smooth this out?
I've pondered just using something out of the "distorts" menu, since the curvature I need in this instance is small. But sincerely wonder if there is just some brush setting that I am overlooking? I've run into this problem a number of times and have never found a suitable solution.
(TIA)
https://i.imgur.com/33HcYmB.jpg
Posts: 1,538
Threads: 71
Joined: May 2021
Reputation:
168
Gimp version:
Operating system(s): Linux
10-05-2022, 05:23 PM
(This post was last modified: 10-05-2022, 05:34 PM by PixLab.)
Try a shorter spacing for the curve something like 95 or 90

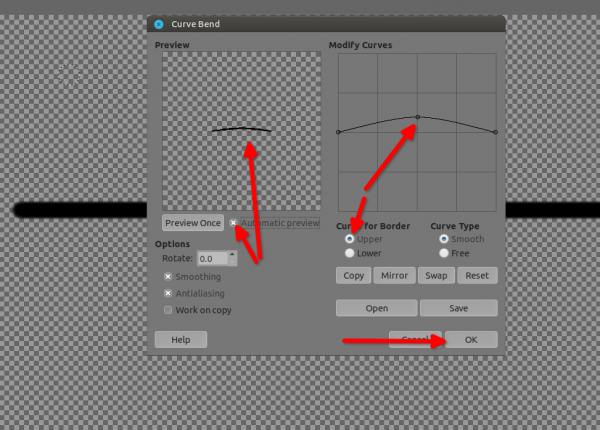
Another option is to do a straight line, (no need to do a path for a straight line), click on one side, then hit Ctrl+Shift+click on the other side (or just Shift+click to not have the 15 degree angle restriction), then go to Filters > Distorts > Curve Bend.. (maybe you might also need to use the "lower" in curve bend, if so while on "Upper, just click on the button "Copy", then directly OK)

Posts: 6,950
Threads: 297
Joined: Oct 2016
Reputation:
605
Gimp version:
Operating system(s): Linux
The paint brush (the "classic" one, the MyPaint one may be different) is just hammering the brush at "spacing" intervals, it doesn't try to fill the gaps. To alleviate this, a possible solution:
- Add fading edges to the brush (top)
- Stroke the path, with a brush spacing around 80% to have some overlap (middle). The joins are lighter because they aren't fully opaque
- Add a layer mask, initialize by transferring the alpha channel, and boost the whites (map 0-128 to 0-255 in Levels for instance) to make the gaps fully opaque (bottom).
Posts: 251
Threads: 26
Joined: Feb 2019
Reputation:
13
Gimp version:
Operating system(s): Windows Vista or 7, 8, 10 (64-bit)
Linux
Sincere thanks to both of you for your suggestions.
Posts: 251
Threads: 26
Joined: Feb 2019
Reputation:
13
Gimp version:
Operating system(s): Windows Vista or 7, 8, 10 (64-bit)
Linux
Ultimately, I concluded that I likely was being over ambitious expecting to draw all that in one stroke. So, I opted instead to draw the squares in one stroke, and the band in another... doubled the height of the square and made the addition transparent, so that the stroke would center on the same path as the band.
![[Image: 8B0ZSWx.png]](https://i.imgur.com/8B0ZSWx.png)
Posts: 1,538
Threads: 71
Joined: May 2021
Reputation:
168
Gimp version:
Operating system(s): Linux
10-07-2022, 03:49 AM
(This post was last modified: 10-07-2022, 03:49 AM by PixLab.)
(10-07-2022, 01:20 AM)rickk Wrote: Ultimately, I concluded that I likely was being over ambitious expecting to draw all that in one stroke. So, I opted instead to draw the squares in one stroke, and the band in another... doubled the height of the square and made the addition transparent, so that the stroke would center on the same path as the band.
Well done, looks way better than our propositions ![[Image: thumbsup.png]](https://www.gimp-forum.net/images/icons/thumbsup.png)
Posts: 1,063
Threads: 88
Joined: Aug 2018
Reputation:
83
Gimp version:
Operating system(s): Windows Vista or 7, 8, 10 (64-bit)
10-07-2022, 05:25 AM
(This post was last modified: 10-07-2022, 05:40 AM by Krikor.)
(10-07-2022, 01:20 AM)rickk Wrote: Ultimately, I concluded that I likely was being over ambitious expecting to draw all that in one stroke. So, I opted instead to draw the squares in one stroke, and the band in another... doubled the height of the square and made the addition transparent, so that the stroke would center on the same path as the band.
[img]...[/img]
rickk,
You could draw the track using paths and then add the blocks afterwards.
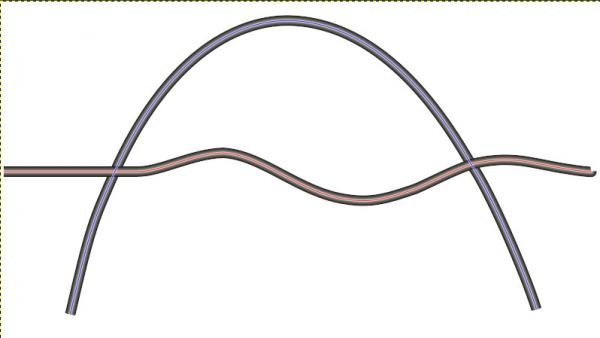
The track below was made by tracing the path (in red) and applying the plugins ofn-gradient-along-path.py

Area expanded by 400%
https://imgur.com/tOWsBWo
![[Image: tOWsBWo.jpeg]](https://i.imgur.com/tOWsBWo.jpeg)
.....
Samj Portable - Gimp 2.10.28 - Win-10 /64.
Posts: 6,950
Threads: 297
Joined: Oct 2016
Reputation:
605
Gimp version:
Operating system(s): Linux
10-07-2022, 07:45 AM
(This post was last modified: 10-07-2022, 07:48 AM by Ofnuts.)
Got me thinking.... If you are doing railtracks, you are going to have a lot of trouble making the ends of the sleepers meet.
So you could investigate using my ofn-path-rungs script. It draws paths across between two paths. So you make two paths for the rails, and use ofn-path-rungs to generate paths for the sleepers. You can then extend them beyond the track paths using ofn-path-to-shape
By the way, there is a lower limit on the curvature radius of railroad tracks, determined by the conicity of the train wheels. This is explained in the 2nd part of this video:
Posts: 251
Threads: 26
Joined: Feb 2019
Reputation:
13
Gimp version:
Operating system(s): Windows Vista or 7, 8, 10 (64-bit)
Linux
10-07-2022, 01:50 PM
(This post was last modified: 10-07-2022, 02:21 PM by rickk.)
Thanks again to everyone for their help, and suggestions.
Actually the end product will be an elevation, not an overhead, I still have some work to do on the gradient that will eventually be the side of the rail. But at least now I'm over the hump on the "seams" problem.
LOL, perhaps by the time Gimp 3.0 is out they will have incorporated A.I. and have a brush dynamic for "liquefy and flow together" to be used with image brushes?
Posts: 251
Threads: 26
Joined: Feb 2019
Reputation:
13
Gimp version:
Operating system(s): Windows Vista or 7, 8, 10 (64-bit)
Linux
10-08-2022, 04:08 PM
(This post was last modified: 10-08-2022, 04:36 PM by rickk.)
How this came about was a desire to illustrate the condition depicted in the following .webp that I made from a Youtube video (warning: 10 MB file size, might not play well with bandwidth restricted connections)
https://i.postimg.cc/ZnTQTJd4/Rail-Bounce3.webp
And when attempting to sketch it out, my brush worked so well drawing a straight rail, that I was surprised with the noise added when attempting to draw the slope.
And, you'd be surprised how often I've just lived with a frustration for years wishing that Gimp could do X, only to see you guys here do exactly what I'd hoped for, except the feature/function is named something other than what I was expecting.
So, I thought it was worth a shot to ask. 
|


![[Image: 8B0ZSWx.png]](https://i.imgur.com/8B0ZSWx.png)
![[Image: tOWsBWo.jpeg]](https://i.imgur.com/tOWsBWo.jpeg)
