I'd like to be able to use the paint bucket tool to flood fill contiguous areas, but in way that treats the image as if it wraps around, such that the left edge connects with right edge and top connects with bottom (effectively a toroidal map). Is there a way to do this in GIMP?
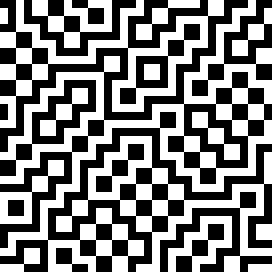
I need this because I'm colouring images that are square in proportion with a pattern that tessellates. These images are generated with cellular automaton rules. See example images. First shows a starting image.

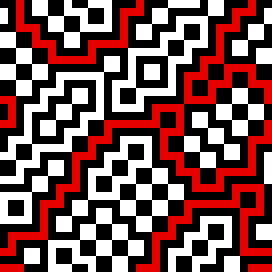
Same image with one connected line flood filled as if with wrap-around:

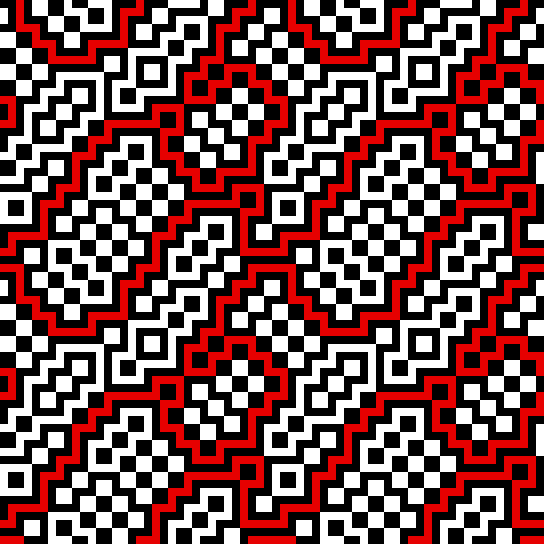
Showing how it connects when tessellated.

Until recently, I've been colouring by hand, using the paint bucket to fill an area, identifying where it reaches an edge, then identifying where it connects on the opposite side, then flood filling that new area, and so on until it returns to the bit that was first filled.
More recently I've been using the Cartesian Transform in the Deformations menu of G'MIC, applying a +1 pixel shift to both X and Y after the first flood fill, which pushes the bottom and right edges over to the opposite sides, showing where to continue the flood fill (instead of judging by eye or by measuring X.Y position). Then applying a -1 shift to X and Y and doing a flood fill from there, and so on until it is complete.
It's looking like the only way to fully automate it is to re-write the code for the flood fill algorithm, so that instead of stopping at the edges of an image it looks at the adjacent pixels on the opposite connecting edge. I've got some coding experience, mainly with Mathematica which I use to generate these cellular automaton images, but am not really a programmer. So any suggestions for how to implement this would be appreciated.
I need this because I'm colouring images that are square in proportion with a pattern that tessellates. These images are generated with cellular automaton rules. See example images. First shows a starting image.
Same image with one connected line flood filled as if with wrap-around:
Showing how it connects when tessellated.
Until recently, I've been colouring by hand, using the paint bucket to fill an area, identifying where it reaches an edge, then identifying where it connects on the opposite side, then flood filling that new area, and so on until it returns to the bit that was first filled.
More recently I've been using the Cartesian Transform in the Deformations menu of G'MIC, applying a +1 pixel shift to both X and Y after the first flood fill, which pushes the bottom and right edges over to the opposite sides, showing where to continue the flood fill (instead of judging by eye or by measuring X.Y position). Then applying a -1 shift to X and Y and doing a flood fill from there, and so on until it is complete.
It's looking like the only way to fully automate it is to re-write the code for the flood fill algorithm, so that instead of stopping at the edges of an image it looks at the adjacent pixels on the opposite connecting edge. I've got some coding experience, mainly with Mathematica which I use to generate these cellular automaton images, but am not really a programmer. So any suggestions for how to implement this would be appreciated.


