02-23-2020, 04:25 PM
A saw the 3D text on the internet (made with inkscape) and I thought why not try this in gimp. Here's the flow :
- new layer (white)
- choose text Kenney Future Square (load it from https://www.1001fonts.com/search.html?se...re&x=0&y=0)
- type your text (here 'GIMP' / color light blue - name the layer GIMP)
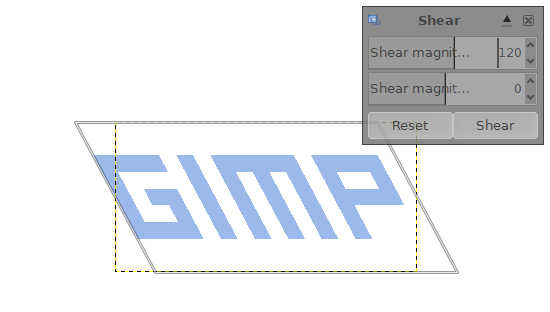
- Tools / Transform Tools / Shear - value 120)
- Tools / Transform Tools / Rotate - value - 24,10)
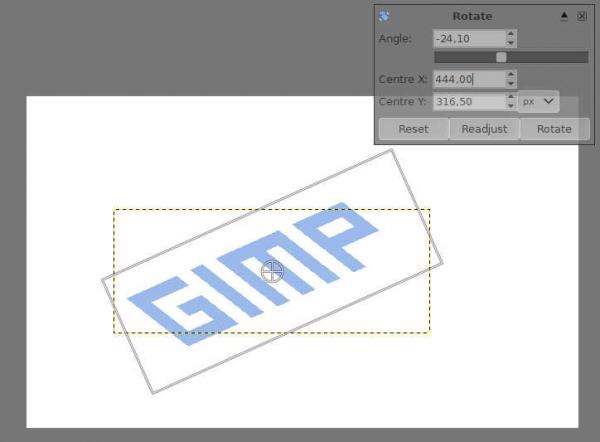
Remark : in this case -24.10 , the 2 corner points the bottom of the 'G' must be in a vertical line (tip : use a raster)
- Chose a lighter foregrond color
- Make a new layer (transparent - in the example name it 'G')
- Make selections with the selection box on the 'G' layer (use shift for making multiple selections)
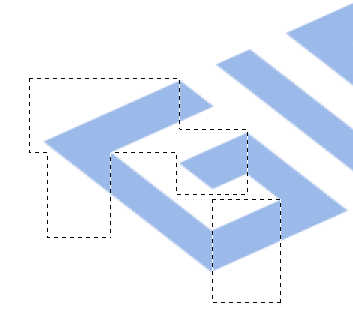
- Fill the selections with the lighter color (on the 'G' layer)
- Make the layer Gimp current layer
- With the 'Fuzzy Select Tool', select the 'G'
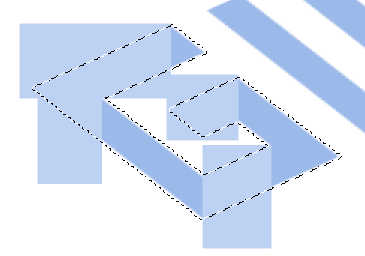
- Inverse the selection (on the gimp menu : Select / Invert)
- Make the 'GIMP' layer current layer
- Delete (on the keyboard)
- Select / None
- Now it looks that the 'G' is sinking down
- The same workflow for the other text characters
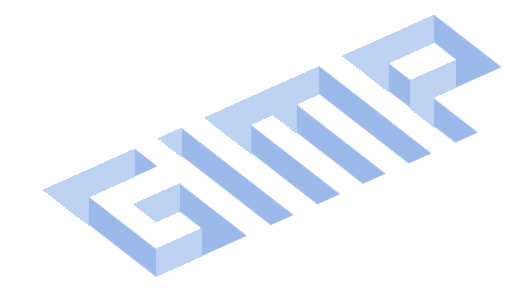
- new layer (white)
- choose text Kenney Future Square (load it from https://www.1001fonts.com/search.html?se...re&x=0&y=0)
- type your text (here 'GIMP' / color light blue - name the layer GIMP)
- Tools / Transform Tools / Shear - value 120)
- Tools / Transform Tools / Rotate - value - 24,10)
Remark : in this case -24.10 , the 2 corner points the bottom of the 'G' must be in a vertical line (tip : use a raster)
- Chose a lighter foregrond color
- Make a new layer (transparent - in the example name it 'G')
- Make selections with the selection box on the 'G' layer (use shift for making multiple selections)
- Fill the selections with the lighter color (on the 'G' layer)
- Make the layer Gimp current layer
- With the 'Fuzzy Select Tool', select the 'G'
- Inverse the selection (on the gimp menu : Select / Invert)
- Make the 'GIMP' layer current layer
- Delete (on the keyboard)
- Select / None
- Now it looks that the 'G' is sinking down
- The same workflow for the other text characters


