Posts: 24
Threads: 8
Joined: Sep 2020
Reputation:
0
Gimp version:
Operating system(s): Windows Vista or 7, 8, 10 (64-bit)
09-17-2020, 07:31 AM
(This post was last modified: 09-17-2020, 07:31 AM by vpkumar.)
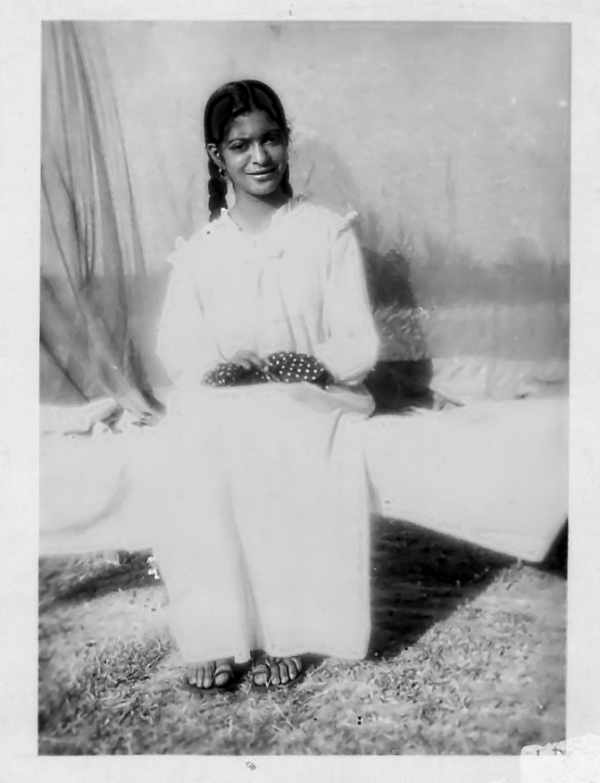
I am trying to correct the over exposure in this photo. I have tried method using levels, exposure, shadows and highlights etc.
Can anyone please tell me the best method to correct the exposure. I am interested in the dress and girl in the photo.
Posts: 1,063
Threads: 88
Joined: Aug 2018
Reputation:
83
Gimp version:
Operating system(s): Windows Vista or 7, 8, 10 (64-bit)
09-17-2020, 11:15 PM
(This post was last modified: 09-17-2020, 11:41 PM by Krikor.)
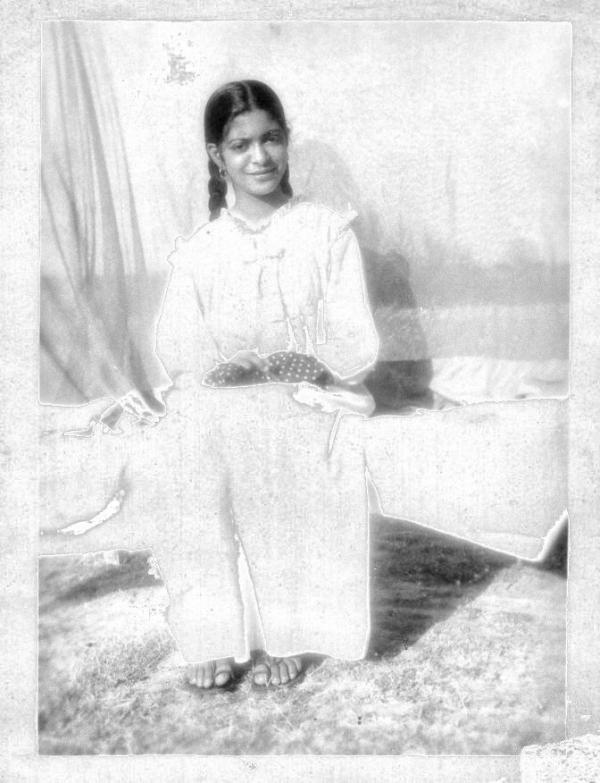
I desaturated the image (color - Desaturated).
I applied Ofnuts Luminosity Masks to locate overexposed areas.
Color - exposure.
Color - Curves
Sharpen (Filter - enhance)

Or slightly pigmented.
New layer, add a color to that layer (f5e6d3), change mode to HSL Color.
![[Image: EZjZ80F.png]](https://i.imgur.com/EZjZ80F.png) https://imgur.com/EZjZ80F
https://imgur.com/EZjZ80F
https://imgur.com/EZjZ80F
https://imgur.com/EZjZ80F
Posts: 243
Threads: 16
Joined: Oct 2016
Reputation:
11
Operating system(s): Windows (Vista and later)
My try:
- by color select
- highlight adj (strong)
- GEGL desaturate

Posts: 24
Threads: 8
Joined: Sep 2020
Reputation:
0
Gimp version:
Operating system(s): Windows Vista or 7, 8, 10 (64-bit)
(09-17-2020, 11:15 PM)Dear Krikor,Thank you very much for the suggestion. Yes I think trying luminosity mask is the best solution.I will have do a bit more work on it. Krikor Wrote: I desaturated the image (color - Desaturated).
I applied Ofnuts Luminosity Masks to locate overexposed areas.
Color - exposure.
Color - Curves
Sharpen (Filter - enhance)
Or slightly pigmented.
New layer, add a color to that layer (f5e6d3), change mode to HSL Color.
![[Image: EZjZ80F.png]](https://i.imgur.com/EZjZ80F.png)
https://imgur.com/EZjZ80F
https://imgur.com/EZjZ80F
Posts: 1,455
Threads: 221
Joined: Sep 2018
Reputation:
134
Gimp version:
Operating system(s): Windows 11
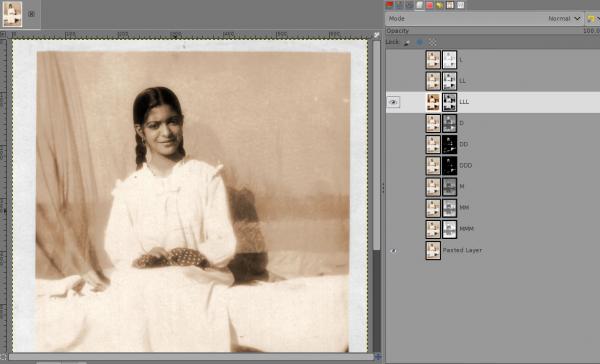
More detail on the dress after a little work with the curves on the LLL layer :

Posts: 1,063
Threads: 88
Joined: Aug 2018
Reputation:
83
Gimp version:
Operating system(s): Windows Vista or 7, 8, 10 (64-bit)
Another option, this time without desaturating the image.
![[Image: W46jfTY.png]](https://i.imgur.com/W46jfTY.png)
Duplicates the layer.
In the duplicated layer use ofnuts luminosity masks - L6
create a new layer, fill with color # f5e2c8, HSL color mode - opacity 34.
Make new the visible.
create new layer, fill with color # f5e2c8, Divide mode.
Create new from visible.
In the new layer use curves to increase the contrast.
Apply a mask on the new layer (white - full opacity) and with a soft brush (black color) brush to regain clarity in areas such as face, hands, etc.
Optional:
Unsharpen Mask (Filters- enhance.
Posts: 24
Threads: 8
Joined: Sep 2020
Reputation:
0
Gimp version:
Operating system(s): Windows Vista or 7, 8, 10 (64-bit)
(09-18-2020, 09:30 PM)Krikor Wrote: Another option, this time without desaturating the image.
![[Image: W46jfTY.png]](https://i.imgur.com/W46jfTY.png)
Duplicates the layer.
In the duplicated layer use ofnuts luminosity masks - L6
create a new layer, fill with color # f5e2c8, HSL color mode - opacity 34.
Make new the visible.
create new layer, fill with color # f5e2c8, Divide mode.
Create new from visible.
In the new layer use curves to increase the contrast.
Apply a mask on the new layer (white - full opacity) and with a soft brush (black color) brush to regain clarity in areas such as face, hands, etc.
Optional:
Unsharpen Mask (Filters- enhance.
Dear Krikore,
Excellent work. But it appears complicated for a beginner like me. I will try out the steps my self.
Do you use a script or plug in for luminosity mask. I have tried it using the basic method. Which layer do I have to use..
which script or plug in do you use. Ofnuts has diferrent versions. I am using GIMP 2.10.20 ver-1.
Thanks in advance,
Posts: 1,063
Threads: 88
Joined: Aug 2018
Reputation:
83
Gimp version:
Operating system(s): Windows Vista or 7, 8, 10 (64-bit)
(09-19-2020, 02:20 AM)vpkumar Wrote: Dear Krikore,
Excellent work. But it appears complicated for a beginner like me. I will try out the steps my self.
Do you use a script or plug in for luminosity mask. I have tried it using the basic method. Which layer do I have to use..
which script or plug in do you use. Ofnuts has diferrent versions. I am using GIMP 2.10.20 ver-1.
Thanks in advance,
I used ofn-luminosity-masks, available at https://sourceforge.net/projects/gimp-to...s/scripts/
Comes with a file containing instructions on how to use.
I like to always create a copy of the initial layer and work on it, leaving the original layer preserved.
Another option is David's dev_eq_lum_mask.py, perhaps more intuitive and easier to use for beginners, available at https://gimplearn.net/viewtopic.php?p=32783#p32783
Note: Where I wrote: Make new the visible, read New from visible.
Posts: 24
Threads: 8
Joined: Sep 2020
Reputation:
0
Gimp version:
Operating system(s): Windows Vista or 7, 8, 10 (64-bit)
(09-19-2020, 12:17 PM)Krikor Wrote: (09-19-2020, 02:20 AM)vpkumar Wrote: Dear Krikore,
Excellent work. But it appears complicated for a beginner like me. I will try out the steps my self.
Do you use a script or plug in for luminosity mask. I have tried it using the basic method. Which layer do I have to use..
which script or plug in do you use. Ofnuts has diferrent versions. I am using GIMP 2.10.20 ver-1.
Thanks in advance,
I used ofn-luminosity-masks, available at https://sourceforge.net/projects/gimp-to...s/scripts/
Comes with a file containing instructions on how to use.
I like to always create a copy of the initial layer and work on it, leaving the original layer preserved.
Another option is David's dev_eq_lum_mask.py, perhaps more intuitive and easier to use for beginners, available at https://gimplearn.net/viewtopic.php?p=32783#p32783
Note: Where I wrote: Make new the visible, read New from visible.
Dear Krikore,
You really are a Guru and an expert. I admire your expertise. Are you a professional photographer and Gimper. I started a few months ago with David Media design tutorials from Udemy. I am 70 yrs old and have started it as a hobby. I love it and want to laern a lot more. Do you also have any tutorials.
Thanks for the tips above. I will follow them.
Posts: 1,063
Threads: 88
Joined: Aug 2018
Reputation:
83
Gimp version:
Operating system(s): Windows Vista or 7, 8, 10 (64-bit)
Hi vpkumar,
I am little more than a beginner with Gimp. I have fun learning a little bit every day.
Congratulations on this new hobby and the constant desire to learn.
There are some good articles and tutorials available on this topic.
I suggest reading on the Blog of Pat David, a great guru from whom I learned a lot:
Getting Around in GIMP I - Luminosity Masks
GettIng Around in GIMP II - Luminosity Masks Revisited
It is even possible not to use any script to use the Luminosity Masks features
The modification made to the image below was basically made using channels, masks and curves.
![[Image: 1PZqv8E.png]](https://i.imgur.com/1PZqv8E.png) https://i.imgur.com/1PZqv8E.png
https://i.imgur.com/1PZqv8E.png
The video of this link is very instructive: Selecting using Luminosity Masks - https://youtu.be/la-zWPwjuQw
|


![[Image: EZjZ80F.png]](https://i.imgur.com/EZjZ80F.png)
![[Image: W46jfTY.png]](https://i.imgur.com/W46jfTY.png)
![[Image: 1PZqv8E.png]](https://i.imgur.com/1PZqv8E.png)