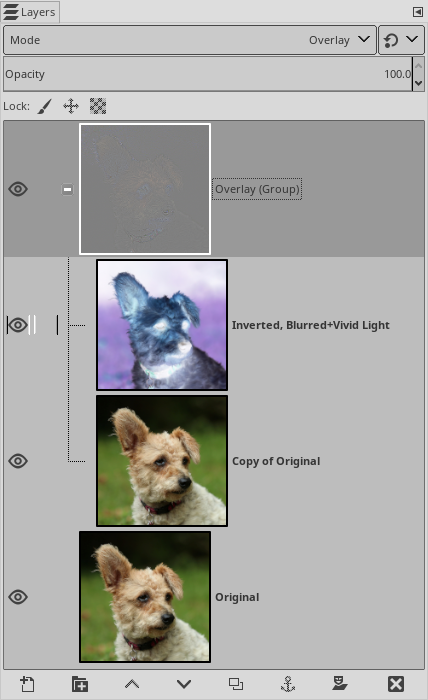
The "Freaky Details" effect has been around for a while(*), but it requires a "Vivid light" layer blend mode that was not available in 2.8 (until it was added in GMIC, but not everyone uses it). Since "Vivid light" has been added in 2.10 there is now everything we need.
The effect is quickly done:

(*) See Pat David's excellent tutorial on pixls.us from which this one derives.
The effect is quickly done:
- Make two copies of your original image (three layers total)
- Color>Invert the top layer
- Filters>Blur>Selective Gaussian blur the top layer (radius around 5 px, max delta around 0.2)
- Add a layer group at the top, and move the top two layers in it
- Set the color-inverted layer to Vivid light mode
- Set the layer group to Overlay mode
You can adjust the effect by playing with the opacity of the layer group or the inverted layer. You can also compare the before/after images by toggling the visibility of the layer group.
Even better: once you have values for the opacities of the layers and group, undo everything, up to and including the blur, set the layer and group opacities (this should give you the initial image) and then apply the blur. Since the blur is applied in real time to the layer, you can adjust the crispiness of the final image using the blur radius cursor.
(*) See Pat David's excellent tutorial on pixls.us from which this one derives.
The Before/after samples:


