Posts: 27
Threads: 7
Joined: Dec 2016
Reputation:
0
11-22-2019, 02:20 AM
(This post was last modified: 11-22-2019, 02:24 AM by marco-gimp.)
Light absorption test - Is it possible using Gimp?
I have just received 150 ml of Black 3.0
... the blackest of all blacks outside of nano-tubes.
The idea is to use it for flocking a telescope, as a one stop solution.
A black paint is anyway required for blacking the lens edges
... but it might replace the need to line the scope with black material.
... also, it can cover the places where material flocking is not possible, such as inside the focus tube.
... and it can be applied to cloth.
The concept is, that stray light cannot bounce down the inside of the scope tube.
Flocking is required; so why not Black 3.0 (3.2 revision)?
YouTube Tests
The YT tests were mostly very poor.
Typically, the testers hadn't even read the instructions.
Most were artists (I guess we can forgive them), but even a photographer for business, with a highly organised setup ... no ... didn't read the instructions 
... which were:
- Use an undercoat
- mix with water
- apply multiple thin coats
(obviously a dark undercoat would be sensible - Black 2.0 is recommended)
One chap did paint a model human head, first with Black 2.0 and then Black 3,0
The result was quite remarkable.
He rotated the head, and it wasn't possible to know which way it was turning!
In a second video, he used a mobile phone luminance app, to attempt to measure reflected light.
However, the numbers were all over the shop - the camera software was modding the ISO, and the camera was being waved (causing a shadow) by hand, over differing samples.
A light absorption figure was produced, but hey ... in truth, the results were meaningless, from a perspective of the quoted precision.
It was a 'good fun' test, with an interesting twist at the end - 11.6m views and counting, so he certainly got the concept right.
I thought of Gimp
A set of sample cards, of different blacks and prep methods.
- Create a black enclosure, with a side opening for a light source, and a top opening for a camera lens.
- Place a card in a set position.
- Photograph each card, with the camera adjustment locked.
- Compare to an image of the closed enclosure
Presumably, the images taken under lit conditions, will be lighter.
The camera can save in raw, or 100 jpg ( is this raw, but in jpg format?)
What tool should I use, to analyse the difference between the different samples, and total darkness?
... something that can give me a number, to indicate total reflected light.
 (currently using 2.8)
Posts: 6,950
Threads: 297
Joined: Oct 2016
Reputation:
605
Gimp version:
Operating system(s): Linux
When I want to see the differences between two images, I stack them as layers, put the top one in "difference" mode, do Layer>New from visible, and look at the histogram.
Posts: 27
Threads: 7
Joined: Dec 2016
Reputation:
0
11-23-2019, 01:14 AM
(This post was last modified: 11-23-2019, 02:08 AM by marco-gimp.)
Thanks Ofnuts; I'm now investigating this tool.

Okay ... I think that I have understood it.
The scale is 256.
Therefore a fully black image would have a value of 0
A slightly less black image might have a value of 2.56
This would indicate that the slightly less black image was emitting 1% of light
... and absorbing 99% of light.
This is the required tool.
Thanks again Ofnut 
Posts: 6,950
Threads: 297
Joined: Oct 2016
Reputation:
605
Gimp version:
Operating system(s): Linux
(11-23-2019, 01:14 AM)marco-gimp Wrote: Thanks Ofnuts; I'm now investigating this tool.

Okay ... I think that I have understood it.
The scale is 256.
Therefore a fully black image would have a value of 0
A slightly less black image might have a value of 2.56
This would indicate that the slightly less black image was emitting 1% of light
... and absorbing 99% of light.
This is the required tool.
Thanks again Ofnut 
No...You can tell that there is a difference, and increasing values mean increasing difference but it's likely not linear by default. The 0..255 scale is "gamma-corrected" so the true value (in a 0.00-1.00 scale) is more or less pow(x/255,2.2) (or is it pow(x/255,1/2.2)?). In Gimp 2.10 you can work in "Linear light" but even then the values are whatever is needed to make the image look right, and not an accurate measurement of incident light.
Posts: 27
Threads: 7
Joined: Dec 2016
Reputation:
0
(11-26-2019, 10:21 PM)Ofnuts Wrote: (11-23-2019, 01:14 AM)marco-gimp Wrote: Thanks Ofnuts; I'm now investigating this tool.

Okay ... I think that I have understood it.
The scale is 256.
Therefore a fully black image would have a value of 0
A slightly less black image might have a value of 2.56
This would indicate that the slightly less black image was emitting 1% of light
... and absorbing 99% of light.
This is the required tool.
Thanks again Ofnut 
No...You can tell that there is a difference, and increasing values mean increasing difference but it's likely not linear by default. The 0..255 scale is "gamma-corrected" so the true value (in a 0.00-1.00 scale) is more or less pow(x/255,2.2) (or is it pow(x/255,1/2.2)?). In Gimp 2.10 you can work in "Linear light" but even then the values are whatever is needed to make the image look right, and not an accurate measurement of incident light.
Thanks Ofnut for continued interest in this question 
The problem for me is that I lack the fundamental knowledge regarding 'gamma' and 'gamma corrected'.
However, your post helped to guide my thoughts on the difficulties relating to linear progression.
First off ... I don't believe that there is need for comparing two images in 'difference mode'.
The image is either black, or less than black.
Black = 0
Therefore there is no difference to be gained.
I tested this with a black and less than black image, and found it to be the case.
So perhaps we can simply concentrate directly on a given image, and its histogram value (unless gamma correction has an effect).
Here are my thoughts (correct me if I'm wrong) :
Quote: When shining white light onto a page containing 256 shades from black to white ...
The power of the light should be such, to allow all the shades to be seen.
Too powerful, there will be numerous whites.
Too weak, there will be numerous blacks.
If all shades can be seen, and photographed, the histogram values should closely approximate to '0 to 255' for each shade.
The camera auto will need to be locked.
We will then have a standardised light-source power.
The power could then be increased by percentages, imaged at each instance, and the histogram values noted.
Ie. a 1% increase in power ... does the histogram value increase by 1% (or by how much).
If using a 12v halogen, through an adjustable AC transformer, the supply lead can be metered.
The question then, is whether the light output increases in a linear reaction to the increase in power?
Therefore I need to know how halogen light output increases against power increase (probably from a given starting point).
I can likely gain that information - ideally gaining an equation to enable 'steps in light output' to be achieved.
This would enable an equation based upon real life scenarios of changing light.
Otherwise:
It may be the case, that for Black 3.0 the power could be increased to the point where reflection begins to register as a histogram value
... and then powered back, to regain zero.
At this point, the light source could be increased by a known amount, and the histogram value noted.
... so providing a percentage of light being absorbed by the material.
This would avoid the need for determining 256 shades of grey (though that might be interesting anyway).
However:
There remains the question mark over gamma and gamma corrected.
What does that mean, in relationship to the experiment?

Posts: 6,950
Threads: 297
Joined: Oct 2016
Reputation:
605
Gimp version:
Operating system(s): Linux
When you use halogen, the color temperature changes with output so the spectrum changes, and the camera isn't built to be uniformly sensitive, it favors the greens.You get a better light source by switching on and off multiple tiny sources such as LED, or by feeding LEDs with a square wave (frequency high enough so that a cycle is negligible compared to exposure duration) in which you change the duty factor.
Gamma is explained here: https://en.wikipedia.org/wiki/Gamma_correction
Posts: 27
Threads: 7
Joined: Dec 2016
Reputation:
0
(11-27-2019, 04:40 PM)Ofnuts Wrote: When you use halogen, the color temperature changes with output so the spectrum changes, and the camera isn't built to be uniformly sensitive, it favors the greens.You get a better light source by switching on and off multiple tiny sources such as LED, or by feeding LEDs with a square wave (frequency high enough so that a cycle is negligible compared to exposure duration) in which you change the duty factor.
Gamma is explained here: https://en.wikipedia.org/wiki/Gamma_correction
I've had a read of the wiki page - I need to study it.
However, it seems that the control information exists.
Regarding the light source, I have a multi LED lamp as used for a motorbike running light.
I don't have the equipment setup, to switch the LED on and off, though I probably have a fast switching chip somewhere.
Neither do I have the kit to feed a high frequency square wave ... at least I don't think so.
Possibly a sonification bath, but without a tech data sheet, and I'm loath to connect my meter to the output, to see what is driving the vibrator.
What do you think about the sonificator?
Otherwise...
Would it be fair to say that an LED using an unmodified supply, will be better than a halogen?
Having said that...
I've just tested the LED assembly with my modified battery charger, that can be adjusted via a dimmer switch.
The LED can be made to go brighter, but I believe that it's circuitry includes regulators.
It wasn't a lab test, but the light seemed to peak and stay there, even though supply was increased.
Perhaps a halogen is more relevant, and easier to understand.
... it's early days.
Anyway; every experiment has its tolerance limits.
It may be, that by carrying out the tests, it will be possible to accommodate corrections into the equation, to gain a reasonably accurate result.
I will build the black enclosure, to provide light entry, and camera access.
(I'm toying with how best to achieve this)
Thereafter, we will see what we see, and make adjustments accordingly.
I've just taken a DNG image, using Open Camera - 30.3 MB
It also saves a jpg set to 100% - 8 MB
I'm now about to locate and download a DNG converter - I believe Adobe provides one FOC.
This project is set to rumble along nicely 
Posts: 27
Threads: 7
Joined: Dec 2016
Reputation:
0
Ha!
Well that didn't go very well.
The Adobe DNG converter was 440 MB download ... and then it wouldn't run due to a missing msvcp140.dll
... which I discovered is a very common problem.
No uninstall info, so had to simply delete it.
Found picosmos about 40Mb, but after installing, it wouldn't recognise dng files.
Perhaps it needs a plug in, however, I recognise these situations
... best to stop now, and try again later with a clear head 
Posts: 27
Threads: 7
Joined: Dec 2016
Reputation:
0
11-28-2019, 04:06 PM
(This post was last modified: 11-28-2019, 04:22 PM by marco-gimp.)
(11-27-2019, 11:18 PM)marco-gimp Wrote: Ha!
Well that didn't go very well.
The Adobe DNG converter was 440 MB download ... and then it wouldn't run due to a missing msvcp140.dll
... which I discovered is a very common problem.
No uninstall info, so had to simply delete it.
Found picosmos about 40Mb, but after installing, it wouldn't recognise dng files.
Perhaps it needs a plug in, however, I recognise these situations
... best to stop now, and try again later with a clear head 
Finally found and installed a tiny DNG viewer called Raw Image Viewer.
I need to look at Gimp plugins but for now this was interesting.
I was surprised to find that the DNG image appears to have no pixel blocks - you can just zoom in for ever.
I also noticed lots of noise, particularly in the dark areas.
The 100% JPG produced better definition in these areas, and the colours were life-like.
Whereas the DNG image was a rusty yellow.
I then locked the camera settings, and took a picture with the lens covered - to gain a totally black image.
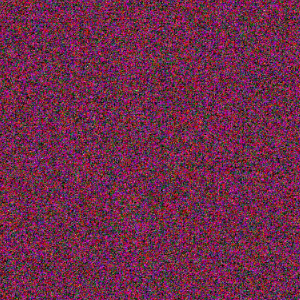
Here are the results in PNG :
Left JPG 100% ... Right DNG


I don't understand how the camera has added coloured noise to an image that is entirely dark.
I have read that for night sky images, when stacked, the raw images are better, as the software gradually eliminates the noise.
This, I thought that I understood, because some light enters the camera lens.
However, with the entirely black image being coloured noise; I realise that I simply don't understand the fundamentals.
As it stands, JPG 100% seems the way to go, though I note that JPG uses gamma correction.
The DNG image contains a colour profile sRGB, though logically it should be at zero colour (the uninitiated might think).
A quick read of some camera threads provided opinions that the problem may be due to :
How the light sensor chip works at a quantum level (apparently too complex to explain)
or
A RAW image does not store colour values for every pixel - instead each value is either a red, green or blue value. However, you need each pixel to have all three colours - red, green and blue - for the final image. Therefore, a demosaicing algorithm has to guess the other two colour parts for each pixels, and it does this based on knowledge of surrounding pixels.
Either way ... it throws a big question mark over whether the camera can be trusted to accurately reproduce the amount of light entering the lens.
Yet the JPG software seems to be able to calculate from an image containing entirely coloured noise, the actual amount of light that has entered the lens.
Loaded in Gimp
I loaded a covered lens JPG 100 image into Gimp, and zoomed to 25600%
No pixel blocks can be seen - every pixel is black.
Using Brightness, increasing from zero, does lighten the black.
This confirms that the JPG, in this instance, has got it perfectly correct.

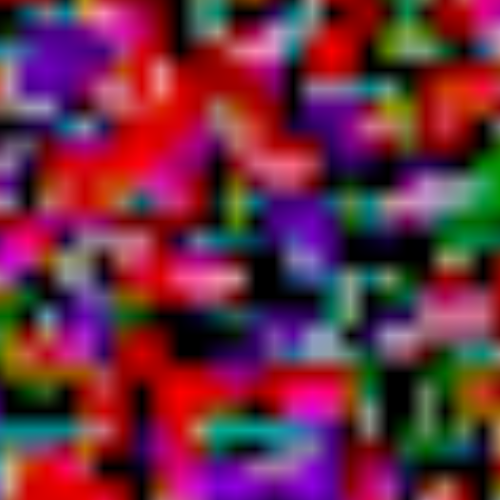
Just for interest, I zoomed in the Black DNG, to the basic image building blocks.
Here is what it looks like:

Posts: 6,950
Threads: 297
Joined: Oct 2016
Reputation:
605
Gimp version:
Operating system(s): Linux
A JPG is 8-bit per channel. A camera that does RAW does 12 or 14 bits. So a JPEG is mostly truncating the lower 4 or 6 bits where most of the noise is.
|


