Thread Rating:
  • 0 Vote(s) - 0 Average
  • 1
  • 2
  • 3
  • 4
  • 5
hatch image
#1
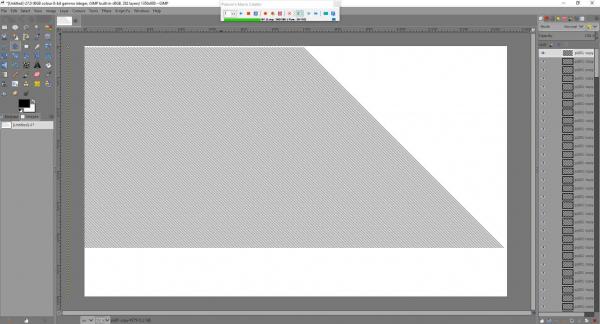
When I have to hatch a technical drawing, I have to draw a line, copy the layer and move the layer (multiple times). I thought a macro creator would be usefull and I've tried the Pulovers Macro Creator (open source). I've made a macro and it is satisfying. Before starting the macro one have to make sure the copy layer is tranparent and set the thichness of the pencil to 1.Then start with an empty image.The macro draw a new image, draw a 45 degree line, copy the layer and move it to the left. This is done up to 150 times. After the macro is ended, all one have to do is make the backgrond layer invisible and merge the visible layers (Image / Merge Visisble Layers). One can then copy and paste the transparent layer and then move the pasted layer to the right to fill out the empty space. Then it is advisible to crop the layer (Layer / Layer to Image Size). In attachment, the macro and the result. If the macro give a fault result on your computer, then change the sleep times. The macro is made for a keyboard with a keypad. It is possible that this does not work on a portable. Then change the Numpadx to x(where x is a number / press right mouse button to change) . I've made also a macro that draw lines with Pulovers Macro Creator but copy layers is much faster.   
   

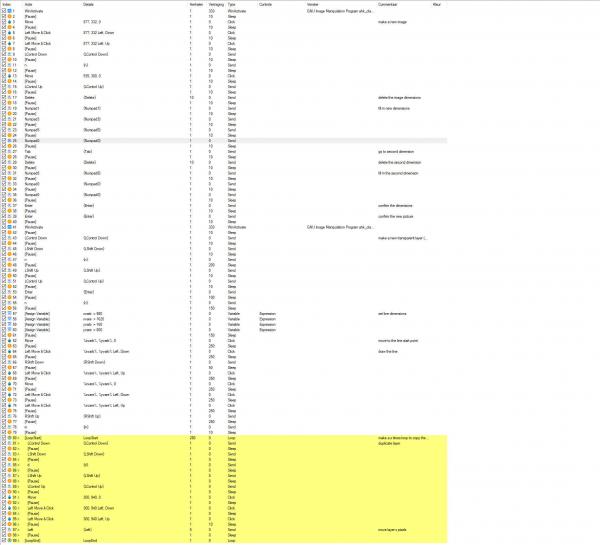
I don't know how to post a file here so I'v made an image of the code :
   

Denzjos
Reply
#2
Two much better ways:

1) Use a pattern such as this and bucket-fill (if the white is transparency, you can easily hatch over an exist image):


Result:
   

You can also use more complex patterns to hatch with alternating dotted lines or the like...

2) Use the Blend tool:
  • Set the gradient typically FG to BG, FG to BG (hard edge) or FG to transparent.
  • Set the tool to Shape: Bilinear and Repeat: Triangular wave or Sawtooth wave .
  • Zoom in your picture (anywhere in the area you want hatched), at least 400%
  • Click and drag to create the gradient.
    • You want the initial spread to be narrow: 3 to 5 pixels (hence the zoom, so that you can move your mouse 12-20 pixels).
    • If necessary depress the Ctrl- key to key the gradient at 45°
    • Check the indicator at the bottom of the image display that tells you how wide the spread is.
Result:


To attach images see this help page.
Reply
#3
3) Use the Ofnuts path-inbetweener

Available from here:
https://sourceforge.net/projects/gimp-pa...s/scripts/

Step 1: Generate the paths
Step 2: Stroke the paths


Attached Files Thumbnail(s)
   
Reply
#4
(01-03-2019, 01:55 PM)denzjos Wrote: When I have to hatch a technical drawing, I have to draw a line, copy the layer and move the layer (multiple times). I thought a macro creator would be usefull and I've tried the Pulovers Macro Creator (open source). I've made a macro and it is satisfying. Before starting the macro one have to make sure the copy layer is tranparent and set the thichness of the pencil to 1.Then start with an empty image.The macro draw a new image, draw a 45 degree line, copy the layer and move it to the left. This is done up to 150 times. After the macro is ended, all one have to do is make the backgrond layer invisible and merge the visible layers (Image / Merge Visisble Layers). One can then copy and paste the transparent layer and then move the pasted layer to the right to fill out the empty space. Then it is advisible to crop the layer (Layer / Layer to Image Size). In attachment, the macro and the result. If the macro give a fault result on your computer, then change the sleep times. The macro is made for a keyboard with a keypad. It is possible that this does not work on a portable. Then change the Numpadx to x(where x is a number / press right mouse button to change) . I've made also a macro that draw lines with Pulovers Macro Creator but copy layers is much faster. Made on screen resolution 1920 x 1080


I don't know how to post a file here so I'v made an image of the code :


Denzjos

Blighty, thank you for the tip, here is the file in .7z format :


.7z   draw layer draw lines move layers c.7z (Size: 1.16 KB / Downloads: 279)
Reply
#5
In this discussion I've searched for another sollution and I found one in the GMIC filters.
1/ make a new square layer
2/ make a drawing on the layer
   
3/ make new layer (white / remove alpha channel)
4/ activate filter : G'MIC QT / patterns / strip and change parameters (different distances between the hatch lines ar possible)
   
6/ copy the new layer and select subtract from the layer below
7/ move the layer a few steps left or right
   
8/ merge down the layer and invert the color of the new layer
9/ make the layer invisible and select the layer with the drawing
10/ select the inside of the drawing with the fuzzy select tool
11/ invert the selection
12/ delete the selection (and merge the layers)
   

Denzjos
Reply


Forum Jump: