Posts: 243
Threads: 16
Joined: Oct 2016
Reputation:
11
Operating system(s): Windows (Vista and later)
I do not remember whether this question was already discussed, hence I apologize in advance if so.
Assume an image has been "quantized" using mode indexed (then back to RGB).
The image shows -for example- areas of 8 different colors (if 8 was used while temporarily converting it to indexed).
But the number of separated color areas is often as expected greater than 8, because there are areas of the same color not contiguous, for example again we see 12 separated areas.
Interactively one may use the fuzzy select tool to work on each separated area, but from inside a script I don't see an easy way to do the same, because the gimp_image_select_color considers all together -as expected- the areas having the same colors, and the gimp_image_select_contiguous_color requires an x,y identifying a pixel position.
Is there a way to access separately each area without using a complex scan of pixels in the image to identify each of the 12 separated areas?
Many thanks.
Posts: 6,950
Threads: 297
Joined: Oct 2016
Reputation:
605
Gimp version:
Operating system(s): Linux
05-18-2019, 04:58 PM
(This post was last modified: 05-18-2019, 05:00 PM by Ofnuts.)
(05-18-2019, 11:46 AM)dinasset Wrote: I do not remember whether this question was already discussed, hence I apologize in advance if so.
Assume an image has been "quantized" using mode indexed (then back to RGB).
The image shows -for example- areas of 8 different colors (if 8 was used while temporarily converting it to indexed).
But the number of separated color areas is often as expected greater than 8, because there are areas of the same color not contiguous, for example again we see 12 separated areas.
Interactively one may use the fuzzy select tool to work on each separated area, but from inside a script I don't see an easy way to do the same, because the gimp_image_select_color considers all together -as expected- the areas having the same colors, and the gimp_image_select_contiguous_color requires an x,y identifying a pixel position.
Is there a way to access separately each area without using a complex scan of pixels in the image to identify each of the 12 separated areas?
Many thanks.
The answer is yes, just let Gimp do it for you:
- Do a color select, and save to channel (because we will use it twice)(channel=pdb.gimp_selection_save(image)). This of course can select several non-contiguous areas.
- Select->To path (in a script, pdb.plug_in_sel2path(image, drawable). This gives you a path with one stroke per area in the selection.
- For each stroke in the path:
- Copy it to a new temporary path
- Make a selection from this path (pdb.gimp_select_item(image, CHANEL_OP_REPLACE,areapath)). You can find this result good enough, for a more accurate result if needed, add the next two steps
- Select>Grow by one pixel: (pdb.gimp_selection_grow(image, steps))
- Intersect this selection with the saved selection (pdb.gimp_image_select_item(image, CHANEL_OP_INTERSECT, channel))
Posts: 243
Threads: 16
Joined: Oct 2016
Reputation:
11
Operating system(s): Windows (Vista and later)
(05-18-2019, 04:58 PM)Ofnuts Wrote: (05-18-2019, 11:46 AM)dinasset Wrote: I do not remember whether this question was already discussed, hence I apologize in advance if so.
Assume an image has been "quantized" using mode indexed (then back to RGB).
The image shows -for example- areas of 8 different colors (if 8 was used while temporarily converting it to indexed).
But the number of separated color areas is often as expected greater than 8, because there are areas of the same color not contiguous, for example again we see 12 separated areas.
Interactively one may use the fuzzy select tool to work on each separated area, but from inside a script I don't see an easy way to do the same, because the gimp_image_select_color considers all together -as expected- the areas having the same colors, and the gimp_image_select_contiguous_color requires an x,y identifying a pixel position.
Is there a way to access separately each area without using a complex scan of pixels in the image to identify each of the 12 separated areas?
Many thanks.
The answer is yes, just let Gimp do it for you:
- Do a color select, and save to channel (because we will use it twice)(channel=pdb.gimp_selection_save(image)). This of course can select several non-contiguous areas.
- Select->To path (in a script, pdb.plug_in_sel2path(image, drawable). This gives you a path with one stroke per area in the selection.
- For each stroke in the path:
- Copy it to a new temporary path
- Make a selection from this path (pdb.gimp_select_item(image, CHANEL_OP_REPLACE,areapath)). You can find this result good enough, for a more accurate result if needed, add the next two steps
- Select>Grow by one pixel: (pdb.gimp_selection_grow(image, steps))
- Intersect this selection with the saved selection (pdb.gimp_image_select_item(image, CHANEL_OP_INTERSECT, channel))
Thanks a lot, Ofnuts !
I'll try your flow.
Posts: 6,950
Threads: 297
Joined: Oct 2016
Reputation:
605
Gimp version:
Operating system(s): Linux
If you need examples you know where to look. ofn-extract-objects uses a similar technique to extract objects from a background.
Posts: 243
Threads: 16
Joined: Oct 2016
Reputation:
11
Operating system(s): Windows (Vista and later)
Sorry for the delay in replying.
Thanks even more a heap, Ofnuts, I downloaded and copied into my filter the parts I needed from your filter, and tested: OK, it works ! I get what I wanted.
(note: "it works" refers to my rough filter, not to your which "ça va sans dire" works perfectly...)
Posts: 6,950
Threads: 297
Joined: Oct 2016
Reputation:
605
Gimp version:
Operating system(s): Linux
(05-19-2019, 12:43 PM)dinasset Wrote: (note: "it works" refers to my rough filter, not to your which "ça va sans dire" works perfectly...)
Bien sûr 
Posts: 243
Threads: 16
Joined: Oct 2016
Reputation:
11
Operating system(s): Windows (Vista and later)
05-20-2019, 09:37 AM
(This post was last modified: 05-20-2019, 11:11 AM by dinasset.)
Ofnuts, I ported the routine from the sample used in my initial test to a filter which quantizes real photos/images (not pseudo-geometric objects as I did before).
Final result is really good (exactly what I liked to have), but the problem with such a kind of sources is that each path created by selecting a colour area has a huge amount os strokes, because the borders of the colour areas are very "jagged" (hope this is the correct term).
Is there a way (one of your magic functions, maybe) to "simplify" the path produced by "selection to path" in order to drastically reduce the number of the strokes?
Thanks.
edit: mitigated the effect applying twice (on the selection before selection-to-path): selection grow (3) and selection shrink (2).
Posts: 6,950
Threads: 297
Joined: Oct 2016
Reputation:
605
Gimp version:
Operating system(s): Linux
Blur, followed by Colors>Posterize (on a copy, just to extract paths). Otherwise, a sample image?
Posts: 243
Threads: 16
Joined: Oct 2016
Reputation:
11
Operating system(s): Windows (Vista and later)
05-20-2019, 12:29 PM
(This post was last modified: 05-20-2019, 01:14 PM by dinasset.)
(05-20-2019, 12:06 PM)Ofnuts Wrote: Blur, followed by Colors>Posterize (on a copy, just to extract paths). Otherwise, a sample image?
I use blur before converting to indexed then back.
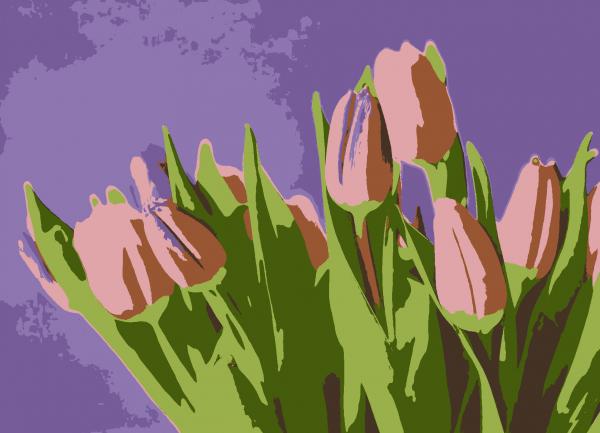
This is how the "quantized" image looks when entering the procedure to "manipulate" the colour areas.

(posted the last one I used)
(05-20-2019, 12:29 PM)dinasset Wrote: (05-20-2019, 12:06 PM)Ofnuts Wrote: Blur, followed by Colors>Posterize (on a copy, just to extract paths). Otherwise, a sample image?
I use blur before converting to indexed then back.
This is how the "quantized" image looks when entering the procedure to "manipulate" the colour areas.
(posted the last one I used)
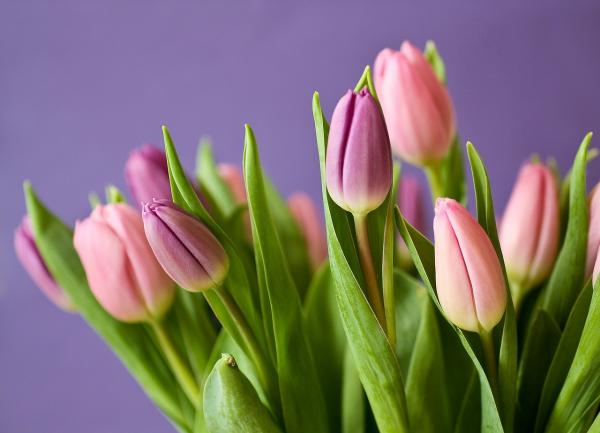
and this is the original

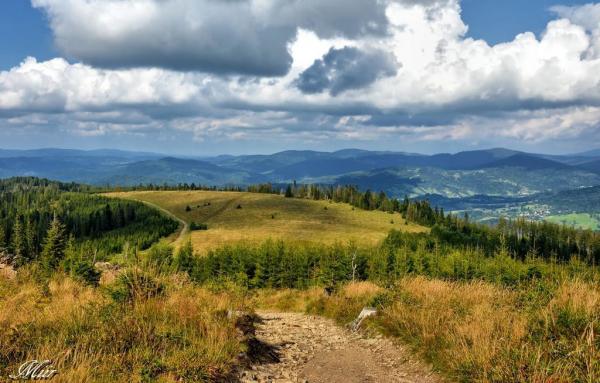
Also with this image strokes are many many.
(but, I manage to get my desired outcome, without waiting too much, I have logic to avoid handling too small areas)

|


