Thread Rating:
  • 0 Vote(s) - 0 Average
  • 1
  • 2
  • 3
  • 4
  • 5
photo retouching: how to repair colored blobs
#1
I have an old print that has some kind of damage on it which looks like a scattering of little red blobs.  The red blobs don't completely obliterate the image underneath, but rather they change its color.  I'm familiar with the technique of filling in missing portions of the image using nearby regions with the Heal tool.  But in this case it seems like I actually have image content in the blobs, so it seems like I don't want to replace the pixels, but rather adjust their color.  I'm wondering if there's a way to do that.   I have attached a section of the image (at full resolution) showing the blobs which are very obvious across the grass and less evident, but still visible if you look on the subject's pink shirt and neck.  

   
Reply
#2
(11-26-2018, 12:28 AM)adrianvm Wrote: I have an old print that has some kind of damage on it which looks like a scattering of little red blobs.  The red blobs don't completely obliterate the image underneath, but rather they change its color.  I'm familiar with the technique of filling in missing portions of the image using nearby regions with the Heal tool.  But in this case it seems like I actually have image content in the blobs, so it seems like I don't want to replace the pixels, but rather adjust their color.  I'm wondering if there's a way to do that.   I have attached a section of the image (at full resolution) showing the blobs which are very obvious across the grass and less evident, but still visible if you look on the subject's pink shirt and neck.  

Just a try, using select by hue (threshold=10) then desaturating the selected areas.
Nothing spectacular, but a bit better.
   
Reply
#3
We want a "soft" selection on the reddish dots. These are reddish because their color has more red than blue or green. We can use that  to isolate the spots with the Monochrome mixer:
  • Duplicate the layer
  • Colors>Components>Monochrome mixer
  • Set the Red multipliers to +2
  • Set the Blue and Green multipliers to negative values, try to find the combination that makes the spots stand out.
   
  • To avoid changing other parts of the picture, cover the right part of the picture with black (no need to be very accurate, except along the lady's arm since it touches one of the spots).
  • Use Levels to make the lightest part completely white (Levels, not Threshold, the selection must remain "soft". The final selection should look like this:
   
  • Open the Channels list, right click any of the RGB layers, and Channel to selection
  • Back to the Layers list, hide the B&W layer, and select the initial layer
  • In Levels or Curves, select the Red channel, and reduce its maximum level
   

  • Final result:
   
Reply
#4
Thanks for this method. I'm off to a great start with that!

I'm a bit puzzled about how to get the colors of the dots to match well. For some reason, in the curves tool, when I lower the red, nothing happens. But in the levels tool, changing the red seems to help. I did notice, though, that in the grass, the red areas have RGB values like 38 36 29 and the green areas 44 37 55, making it seem like what I really need to do is raise the blue rather than lowering the red. In the curves tool I can raise the blue and turn the spots blue, but they don't blend, so I'm a bit puzzled. It seems like it would be nice if there was a way to match the average color between the selection and another region rather than having to do trial and error. It also seems like I need to treat the dark background area (along the top of the picture) in a different way than the grass. Those areas do indeed seem to need red reduction rather than an increase in the blue.

I have pretty good success in selecting most of the red splotches, but really not good success at getting the red stripe along the subject's neck. Any ideas on how to capture that one? I could bring it out slightly by using a weighting of 1,0,-2, but the result followed facial features and want great. I found the method of using a layer mask to check how well the splotches were captured by process. Is that the best method? (Is there an easy way to make the layer mask more extreme---I selected to convert grayscale to alpha, but it means only the brightest points in the mask really show up.)
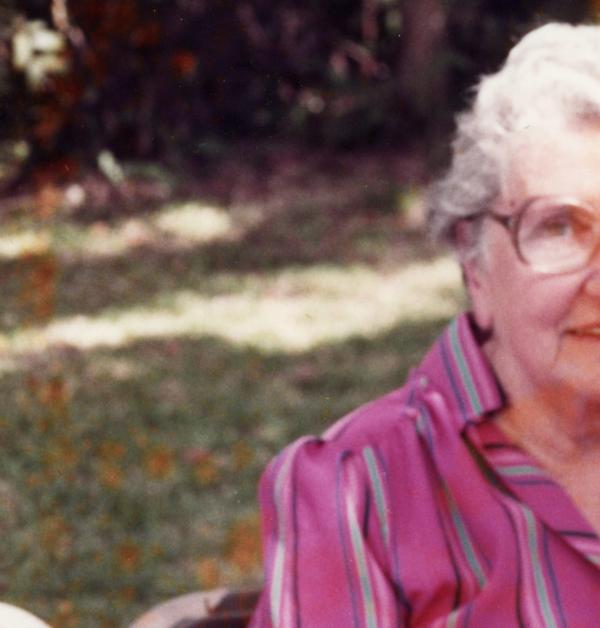
Reply
#5
I got great results in repairing the blobs in  grass region using this method, and I think the results on the subject's face look promising.  But I'm stuck on the background areas, and especially the blob right above the subject's head.  Once I have it selected, what I can I do make it blend into the background? 

Here's the original:


Here's one of my more successful fixes.  There are various blue splotches that would need additional correction, but worse, the blob is still visibly different.  It doesn't blend with the background. 


I did this with levels.  Does anybody have any advice on how to get a better result?   I tried experimenting with heal, to copy nearby regions, but it didn't seem to do anything.  I guess it preserves shadows and considered the whole region a shadow?  I'm not sure.
Reply
#6
Another option is to isolate the woman from the background en change the color of the background using the gimp tools (hue, color temperature, etc..) and then use a inverted color to correct the color on the woman. One can use the heal tool and the brush optimise the color transitions on the face. Now the backgrond is a a little 'greenish' but one can correct it using the gimp colour tool.

     
Reply


Forum Jump: